As the sun’s rays shine between the trees, glinting off the frost covering the bare aspen branches outside my window, I can feel the promise of spring, even as winter weather lingers. I know that soon buds on aspen branches will burst with fresh spring leaves and winter will give way to a new season! The arrival of spring is one of my very favorite times of the year. It’s a great time to get outside and explore. Longer days, warmer temperatures, new leaves and blossoms, and the return of migrating birds await you.
There are so many ways to celebrate spring, no matter your age, but these are some of my favorites!
1. Go on a hike and look for signs of animals!
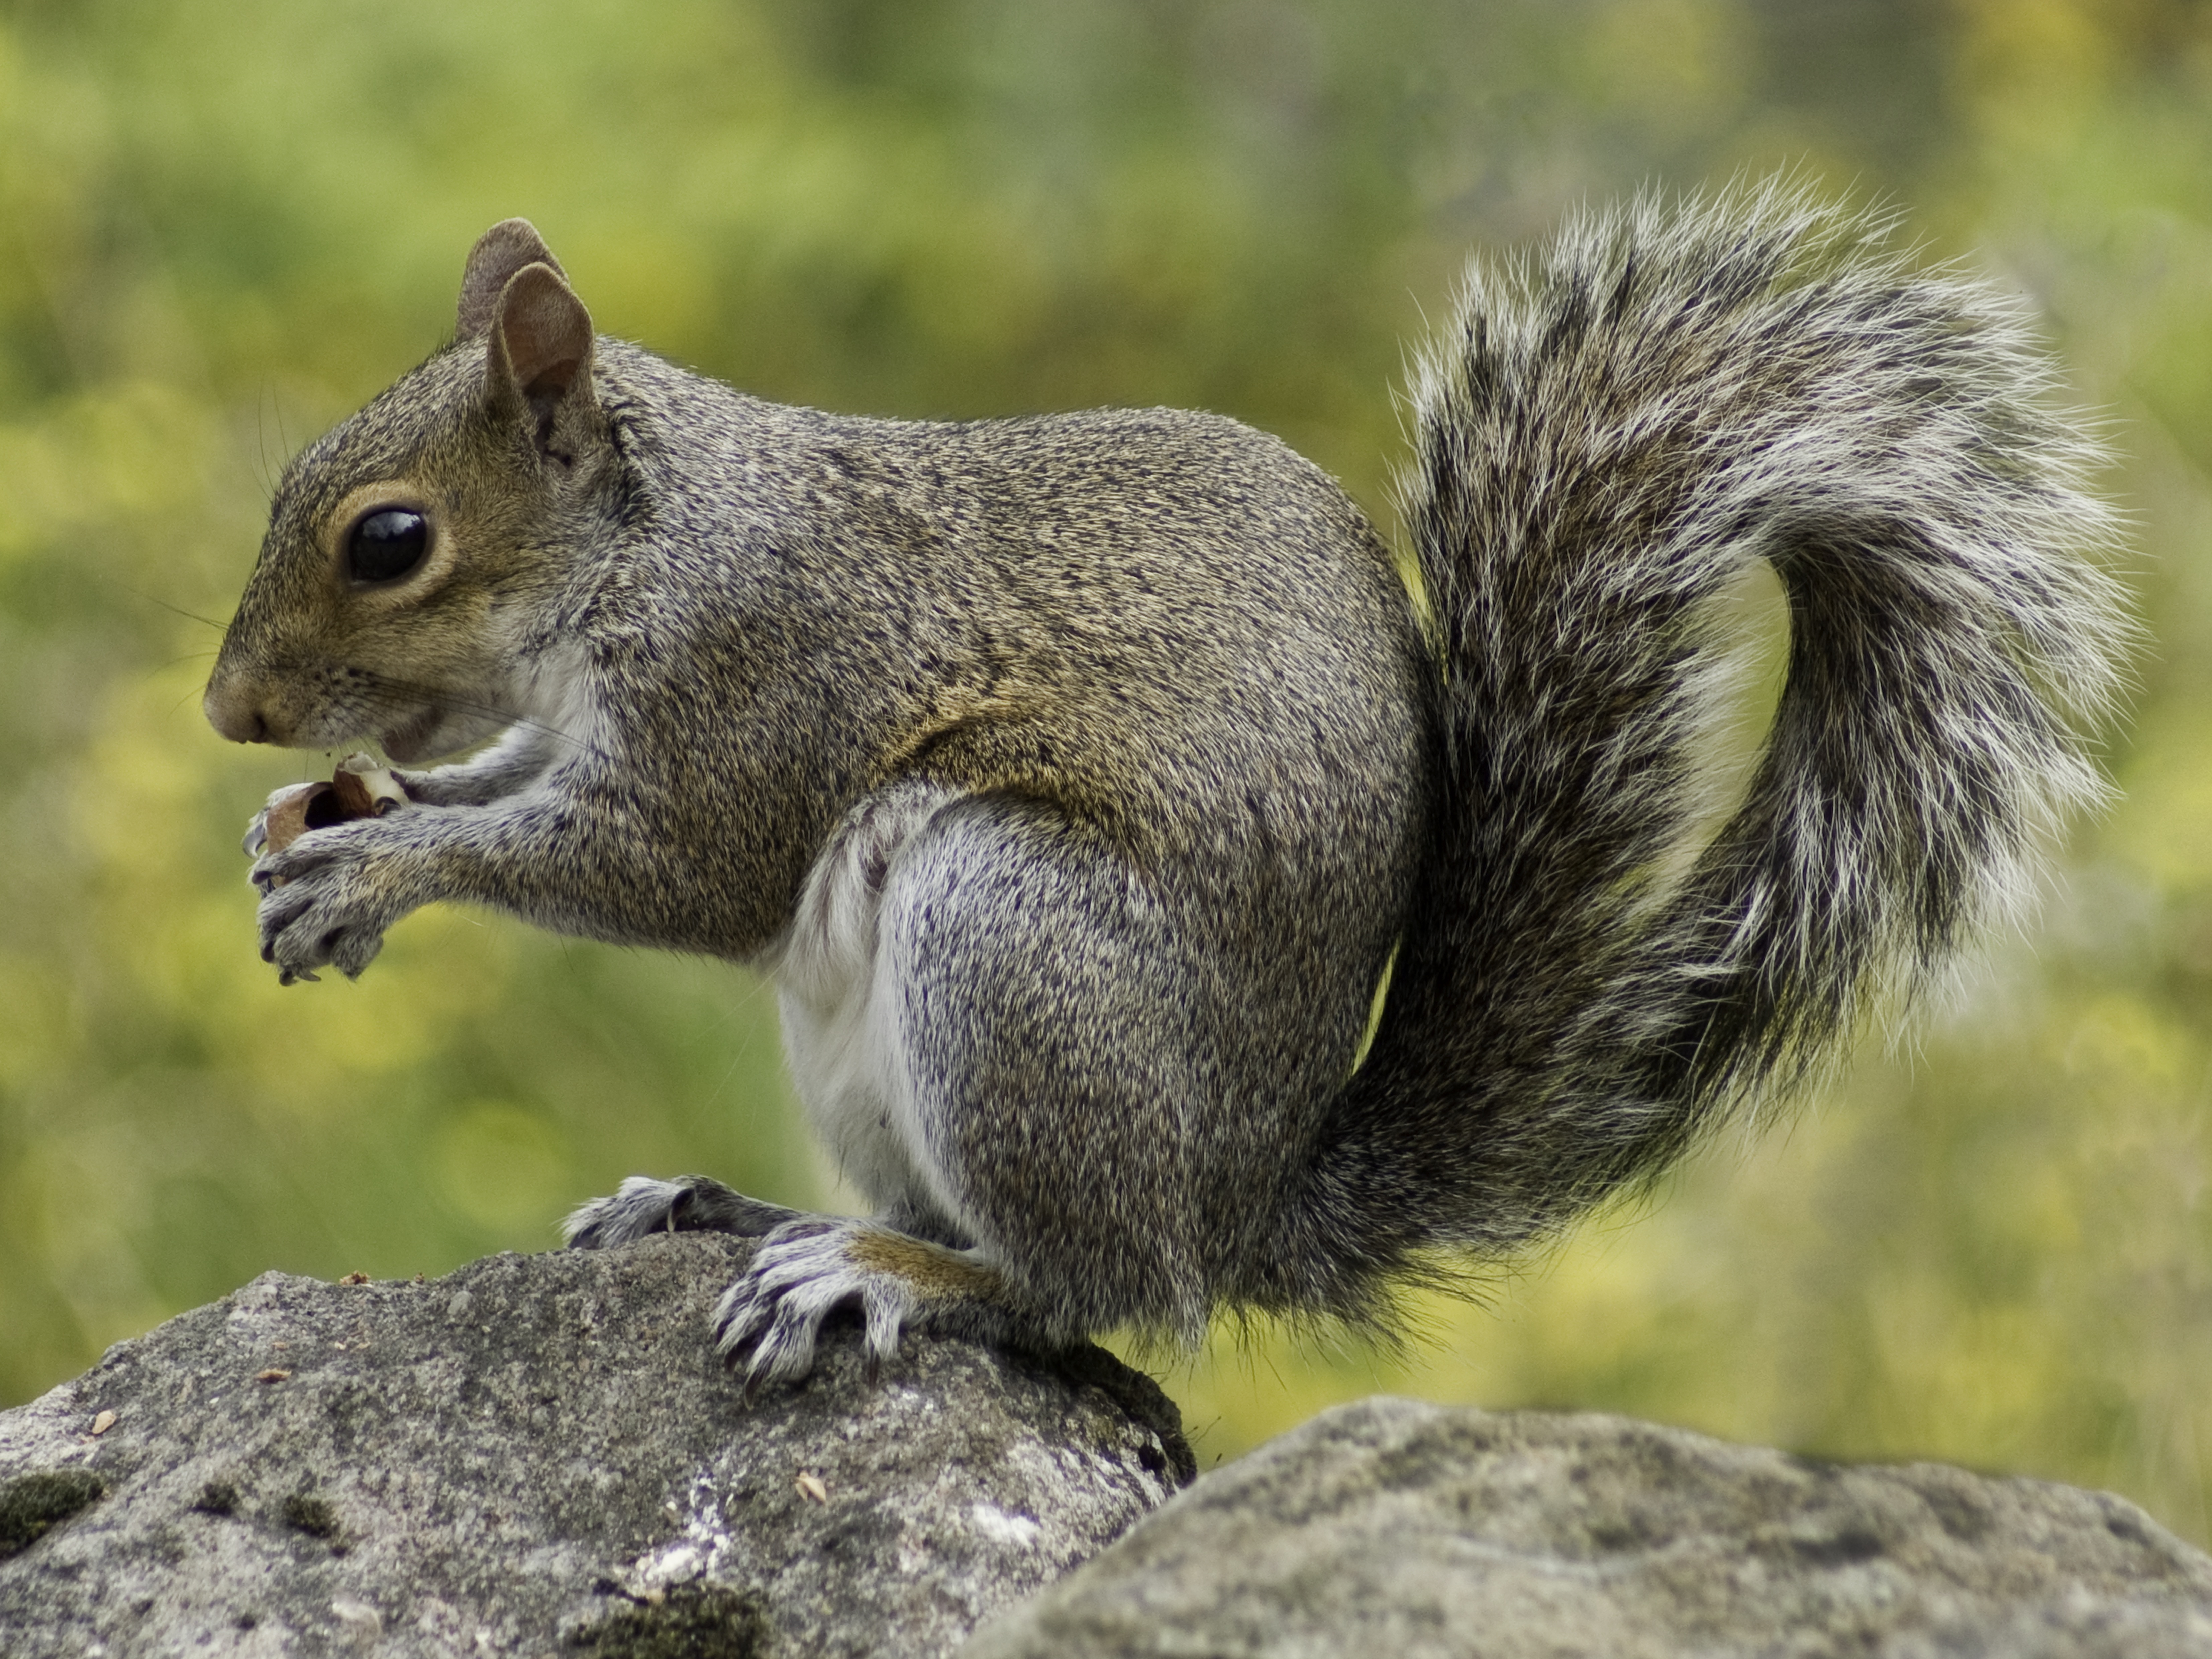
In the spring, animals such squirrels and rodents are emerging from hibernation or torpor (periods of long slumber, but not true hibernation). You’ll see signs of their activity such as chewed pine cones and nibbled plant shoots.
Make a simple chart to focus your observations. Sketch what you see!
– Scat (animal poop)
– Tracks (footprints)
– Forage (chewed pinecones, nibbled branches, etc.)
– Homes (nests, dens, etc.)
Come stroll the Museum’s many nature trails and look for signs of animals such as the golden-mantled ground squirrels and chipmunks, which are very active this time of year. Check the feeders in the wildlife viewing area for spring activity. Talk with a wildlife expert at the Museum if you have any questions about birds and mammals you’ve seen during your visit.
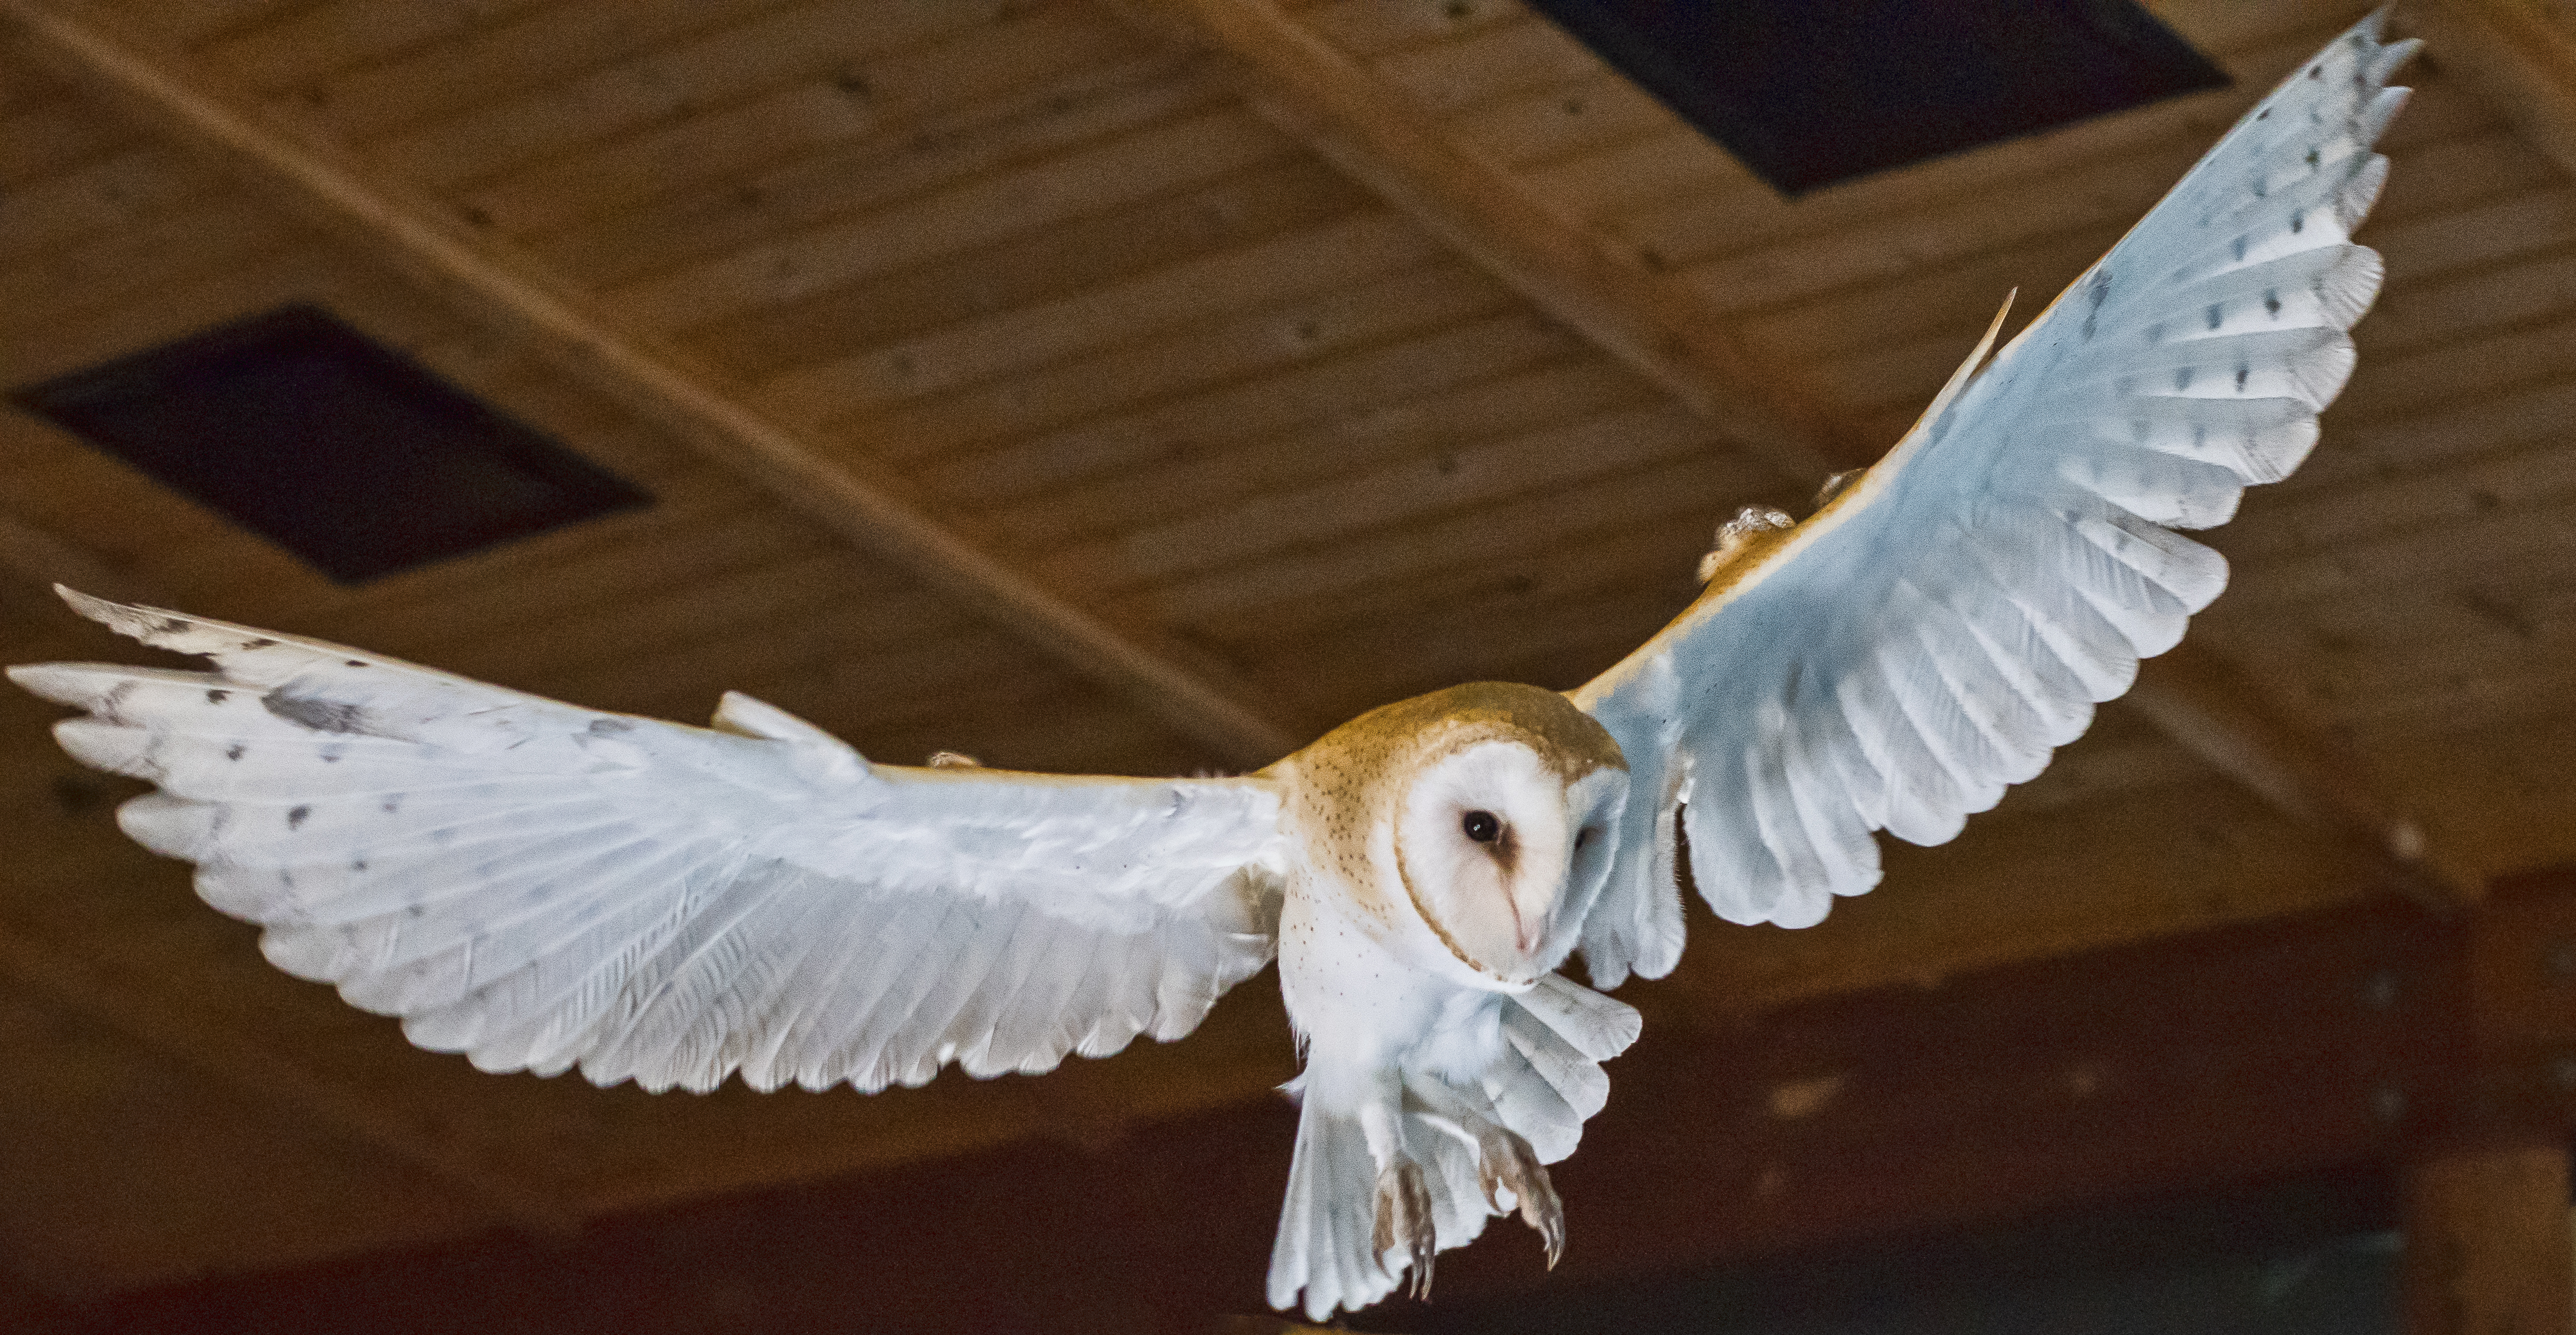
After watching the busy songbirds at the Museum’s feeders, get an up-close and personal view of raptors during our “Sky Hunters” program, offered for a limited run each year during spring break (March 24-31, 2018). Watch as powerful aerial predators take flight overhead in this intimate, free-flight demonstration showcasing each bird’s agility and grace. Date, time and price information can be found on our website calendar.
Families with young children will also enjoy exploring our “Who’s Home?” interactive exhibit. Watch as your little ones get creative, imagining they are snakes in the rimrock, just emerging from hibernation!

2. Start sunflower sprouts!
Sprouting seeds indoors before you plant outside helps the plant develop in a controlled environment. Or, rather than planting outside, have you ever eaten fresh microgreen sprouts? They are extremely nutritious, and, when grown in your own kitchen, very local!
By planting sunflower seeds inside, you can choose to transplant some outside where they will grow into tall sunflowers come summer, and save some for a delightful, edible treat.
Black oil sunflower seeds are my favorite. You can find quality seeds at a garden supply store, or by searching online.
1. Purchase quality seed. I use black oil sunflower seeds. Though other types will work, these are the least expensive.
2. Soak your seeds in warm water for 12 hours in a covered container. I recommend about two cups.
3. Drain and rinse.
4. Soak the seeds again in warm water for another 8-12 hours. (Repeat steps 3 and 4 until the seeds start to sprout.)
5. Once the seeds have begun to sprout, fill a clean, plastic nursery tray with moistened seed-starting potting mix nearly to the top.
6. Sow the seeds thickly across the entire tray then cover
it with another inverted nursery tray to block out the light. There is no need to cover the germinating seeds with more potting soil. Be sure there are some small holes in the top tray to allow for ventilation.
7. Water the tray from the bottom once or twice per day by setting the tray in a bigger tray of water for a few minutes.
8. As the shoots grow, they’ll push up the top tray (usually within a few days). At this point, remove the top tray to expose the growing seedlings to light.
10. Move the tray in front of a bright, sunny window.
11. Continue to regularly water by spraying shoots and soil with a spray bottle several times a day.
12. Harvest the sunflower shoots that you want to eat when they reach 4 inches high by cutting them off at soil level with sharp, clean scissors. Transplant the rest of the shoots outside!
13. Store unwashed sunflower microgreens in a sealed plastic bag in the fridge for up to five days. Wash them as you need them by running the shoots under cold water. They are delicious on sandwiches and salads!
By planting seeds indoors, kids get to witness every stage of the sprouting process, and then taste the results of their efforts and watch as their sunflowers grow and mature in the yard or garden.
Did you know?? At the Miller Ranch, the Millers are also getting ready to start a garden for the summer. Come ask the Millers about what they are doing to prepare their garden.
Spring is a prime time for sprouting in the great outdoors, too! Look for bud bursts and other signs of spring on the High Desert Natural History Walk at the Museum, offered daily.

3. Make a Bird Feeder
More than half of Central Oregon’s birds depart for the winter, leaving about 175 species that are hearty enough to survive the cold temperatures, snow, and scarce food. But come spring, migrant birds are returning and need to replenish after a long journey! Create this ponderosa pinecone bird feeder, and survey the local birds that come visit! Consider placing the feeder away from windows to mitigate collisions. Take it one step further and apply window stickers so birds don’t mistakenly fly into the glass!
You will need:
– Large ponderosa pine cones (found on the ground on an outside adventure!)
– Peanut butter (shortening for people with nut allergies)
– Birdseed
– String
– Butter knife
– A shallow dish
– And, of course, a place to hang your bird feeder! (a tree or bird feeder hanger work nicely)
1. Shake or lightly brush the pinecone to remove any dirt or debris. Trim off any loose scales that may break off as you create your feeder.
2. Tie string securely around the cone. Create a loop to easily hang your feeder from a tree branch.
3. Use the knife to coat the cone with a layer of peanut butter, pressing some between the rows of scales, filling in larger gaps. If the peanut butter is too thick to spread well, it can be warmed up slightly in the microwave to make it easier.
4. Once the cone is completely coated with peanut butter, roll it in the birdseed in a shallow dish, pressing lightly to keep the seed adhered to the cone. Work the seed in between the rows of scales.
5. Feeders can be hung immediately, or can be frozen for several weeks. The feeders do not need to be thawed before hanging.
6. Hang your feeder and carefully watch for visiting birds!
For bonus points, record the species you observe on eBird (www.ebird.org) – a partnership of the Cornell Lab of Ornithology and the Audubon Society. There, you can see what types of birds other people have seen in your area, and share your sightings with others.
Learning about birds in your own backyard is an excellent extension of learning to complement your Museum visit. What do the birds in your backyard have in common with birds at the Museum? How are they different?
I hope you can use these activities to embrace the changing seasons! Spring is a blend of showers and sunshine, but whether sun or rain (or even snow), there’s plenty to explore to stay busy! When you’re warming up (or drying out) back indoors, continue your celebration of spring with these books:
Spring children’s books:
And then it’s spring by Julie Fogliano & Erin Stesd
Seeds, seeds, seeds! By Nancy Elizabeth Wallace
Seeds sprout! (I like plants) by Mary Dodson Wade
The Tiny Seed by Eric Carle
First the Egg by Laura Vaccaro Seeger
The Stick Book: Loads of things you can make or do with a stick by Fiona Danks and Jo Schofield
Spring adult books:
Pilgrim at Tinker Creek by Annie Dillard
Mind of the Raven by Bernd Heinrich
What the Robin Knows by Jon Young
Devotions: The Selected Poems of Mary Oliver by Mary Oliver